When it’s time to celebrate a birthday or other special occasion, wouldn’t it be handy not to have to fuss about shopping for or putting together decorations? I’ll show you how easy it is to make your very own diy birthday banner that you can use year after year for all of your family members!
I recently wrote about special birthday ideas for kids so you can celebrate without the stress and strain of elaborate birthday parties.
For each person’s birthday, I hang our homemade birthday banner on the mantle. The diy birthday banner is extra special because I used fabric pieces from our wedding napkins and bits of fabric from the kids’ baby clothes which makes it unique.
You can make a happy birthday banner for your family too! You can make it with sentimental items or you can choose any fabric combinations that you love.
You don’t have to have a sewing machine and no need for seamstress skills….I will show you a few different ways to create a meaningful diy birthday banner that you will be proud to display.

This post may contain affiliate links meaning that I may earn a small percentage (at no extra cost to you) if you make a purchase through a link that I share. See full disclosure.
SHORT ON TIME? SAVE TO PINTEREST NOW & READ ABOUT DIY BIRTHDAY BANNER LATER!
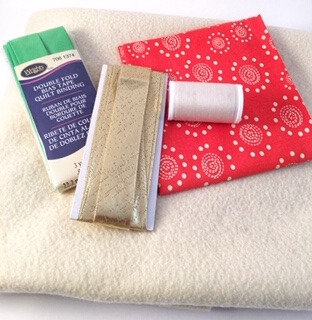
DIY Birthday Banner Supplies
First, you will need to gather supplies. You may already have many of these items. If not, this is a very inexpensive project making it perfect if you are always on the look-out for money saving tips .
- Felt in whatever color (or colors) you prefer.
- Fabric—This is the perfect opportunity to use up any scrap fabric pieces you may have from previous projects.
- Something to attach the banner pieces to—I use double fold bias tape, but you could also use ribbon or twine.
- Hot glue gun,thread and needle, or sewing machine (this is a fantastic sewing machine for beginners as well as experienced users if you don’t yet have a machine.)
- Scissors
- Frixion pen to trace the letters
- Letter templates and pennant template to trace around–FREE TEMPLATE PRINTABLE IN THE RESOURCE LIBRARY
RELATED: HOW TO SAVE MONEY: THINGS I QUIT BUYING TO SAVE OVER $10K/YEAR
I will show you three different ways you can make the letters on your diy birthday banner. You can choose which method you like best.
Option 1
Peek-a-boo hand sewn

Option 2
Peek-a-boo machine sewn
Option 3
Felt letter hot glued
Step 1
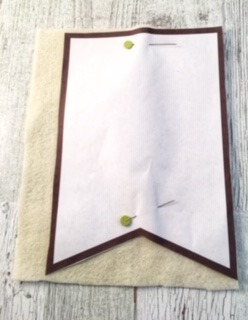
Print and cut out the pennant template you will use, (you can print on cardstock or paper) pin it to the felt, and cut around the template.
You can find free printable templates for your DIY birthday banner in the Resource Library.
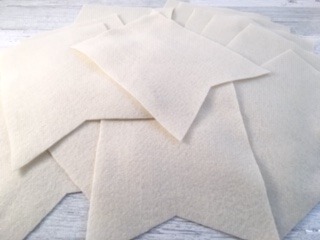
*Bonus tip* You can cut out several at a time by pinning the template to 3 or 4 layers of felt.
Step 2
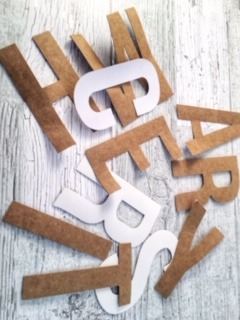
You will need letters to trace for your banner (unless you have great penmanship skills and want to freestyle it;-) If you don’t have letters to trace, you can print on cardstock and cut the letters out.
Step 3
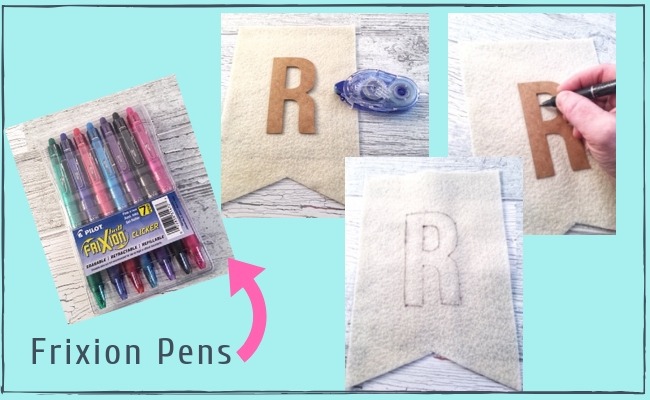
I use a bit of adhesive to hold the letter in place on the felt for tracing. I trace around the letter onto the felt with a Frixion pen.
These pens are absolutely one of my favorite things! They erase with complete ease from paper and I use them all them time for crafting and sewing projects.
When you mark on fabric with a Frixion pen, you simply apply a small amount of heat with an iron and the ink is completely gone!
So go ahead and trace around the letter template but don’t iron it yet! You need the pen marking to be on the fabric for the next steps.
RELATED: The 9 Best Gifts to Buy for 6 Year Old Boys
Step 4
Now take the fabric you have chosen to use and place it underneath the felt piece.
Put the right side of the fabric under the felt so the fabric’s right side is touching the felt’s backside. Now pin the fabric in place.

Step 5
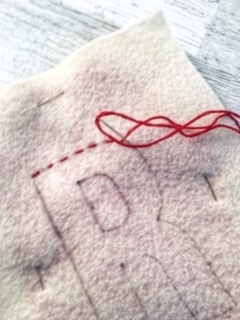
For Option 1—Peek-a-Boo Hand Sewn Letters
Hand stitch with embroidery thread along the line you drew. I didn’t separate the embroidery thread strands so I used all 6 strands together.
*Note* Options 1 and 2 are great if the backside of the banner won’t be displayed since the back is unfinished. This works perfectly if hanging the banner on the mantel or on a wall.
For Option 2—Peek-a-Boo Hand Sewn Letters
You will follow all of the steps as above except instead of hand sewing with the embroidery thread, use your sewing machine to stitch around the letter.
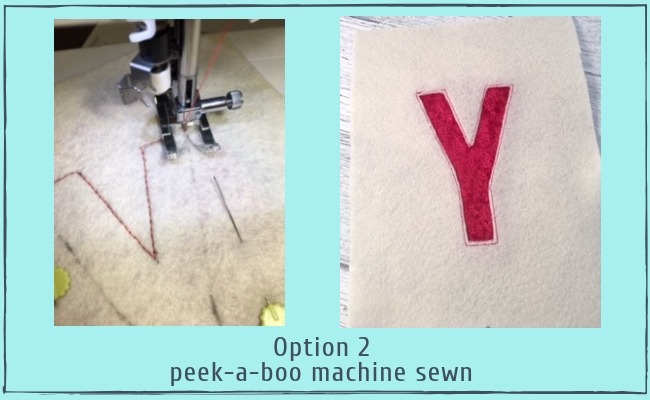
When you have finished stitching around the letter, quickly rub a warm iron over the pennant and any remaining ink will disappear! You’ll feel like a magician!
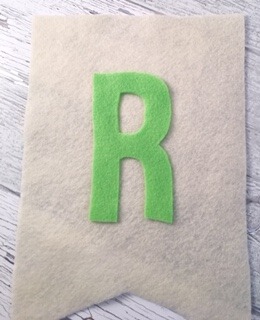
Option 3—Hot Glue Banner Letters
This is a great option for those who don’t like hand sewing or maybe don’t have a sewing machine. I enjoy hand sewing simple embroidery type stitching, but if it’s not your cup of tea, then grab your hot glue gun. That sucker never let’s us down!
You will need to trace the letters onto felt rather than fabric for this option.
Then cut out the felt letter and simply glue it to the felt pennant.
Such a simple way to make an adorable diy birthday banner if you need it in a hurry!
Step 6
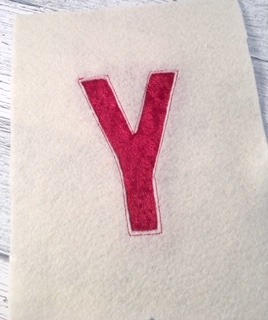
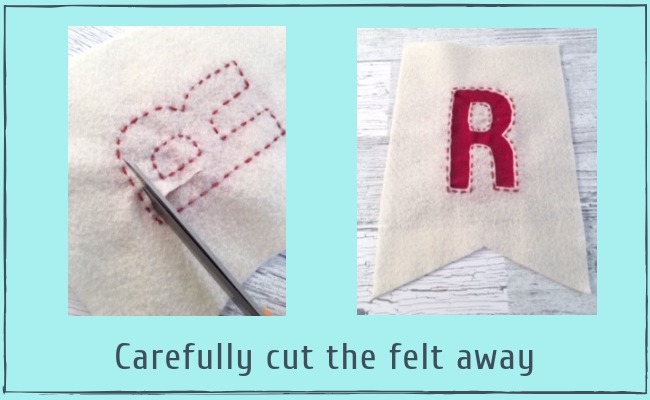
Now you will need to cut the felt away so the fabric peeks through. Carefully pinch a small piece of the felt between your fingers to separate the felt from the fabric. Then, gently make a small snip and slowly cut around the inside of the letter staying close to the thread (without cutting the thread.)
RELATED: 10 BEST GIFTS FOR 5 YEAR OLD BOYS
Step 7
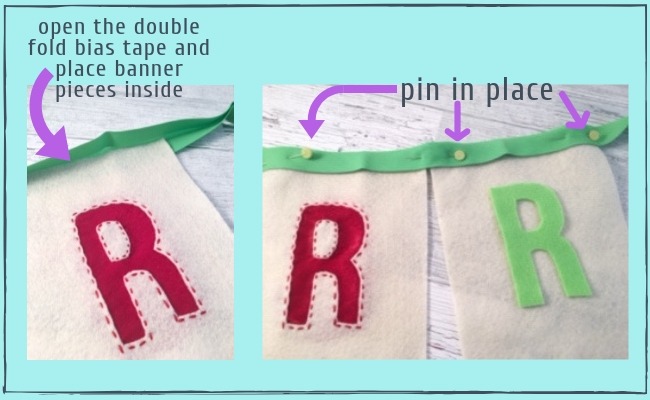
Now it’s time to put the banner together. I use double fold bias tape that is meant for binding quilts, but you could also use ribbon or twine.

Open the folded bias tape and place the banner pieces inside. Pin them in place.
Be sure the leave 12 inches or so of length at each end to use for hanging your banner.
Step 8
Once you have arranged the banner pieces onto the bias tape and pinned in place, you can quickly sew across.
If you want a no-sew alternative, you could carefully use a bit of hot glue to secure the pieces. It would also be cute to use clothespins to attach each piece to a ribbon or twine.
To complete your birthday decor, you could make these DIY Mason Jar flower arrangements. And if you need to tidy up the house quickly, you’ll definitely want to check out my post to clean house FAST with non toxic cleaning ingredients.
Other Ways to Celebrate with a DIY Party Banner
Birthdays aren’t the only time to use a decorative party banner. You can jazz up any special occasion with a fun little homemade banner!
Some other occasions you could make a banner for:
- Wedding
- Anniversary
- Baby Shower
- Gender Reveal
- Wedding Shower
- Valentine’s Day
- Christmas, Holidays, New Year’s
- Thanksgiving, Fall, Halloween
- Easter
- Graduation
- Congratulations
- Fourth of July
When the party is over, simply fold up your gorgeous diy banner and it will be ready to bring out next year!
What special occasion will you make a banner for?
BEFORE YOU LEAVE….will you do me a big favor?
If you liked this and thought it was helpful, would you share to Pinterest or Facebook? It lets the search engines know that I provide quality content and helps keep my website alive. 🙂
Thank you SO much!!
More Articles from Handling Home Life You Will Love: